The Flatrail: A Celebration
By David Hanson
The flatrail is a beautiful symbol of wakeskating’s unlimited potential. It so plainly celebrates the fact that we as wakeskaters don’t need to build bigger rails to do better tricks. And for that I would like to thank you, kind flatrail. I think in a lot of ways flatrails can teach us about ourselves. It creates the basis of progression and has become a stage for riders to express themselves. If you want proof just go check out Andy Pastura’s website, Water Monsters. Ben and Andrew and Hooker are making history right now filling in the gaps towards what wakeskating can become, and it’s all thanks to the simplest rail there is. Combined with the capabilities of winching, you and your buddies can start having serious flatrail sessions at your nearest neighborhood pond, and it’s totally legit. The best part is that you can probably scrape up enough wood and borrow enough tools to make your very own flatrail for minimal costs by following these simple steps.
Location
You should probably already have a place scoped out for where you want your new flatrail. I would recommend somewhere low key and away from the limelight of the common spectator or pedestrian. If you are going with the winching route, try to find a pond or spot of water that is away from the eye of someone that might be driving by. Also consider having a good spot for the winch and parking availabilities. The main thing is you want to be able to session in peace, and you always want to be able to leave your rail without thinking somebody might mess with it.
Materials
First of all you need wood. 4x4s work best for the support beams that will be put into the ground. Wood availability may help determine your rail’s dimensions. Anything under twenty feet long is too short to get more than a tap on. Even if you’re a beginner just trying to learn how to get on the rail and get off in one piece, you should still plan on conquering that feat soon and when you do you will wish you had a full twenty footer to enjoy. The most expensive part of the rail is the sliding surface. Most lumber places should have Trex or some other kind of decking board. This stuff works amazing and I highly recommend it (easy to work with and durable). You will also need boards running along the side of the rail to fasten the Trex. For this rail we are using 1x4s running on the top of each side of the 4x4s in the ground. You have the option of adding another 2×6 or 1×6 on top of the running boards for the Trex to screw to, but it’s not completely necessary (let’s keep a wakeskater’s budget in mind). A single board of Trex is about six inches wide and fits perfectly over the top of this. If you use 2x4s on the side you can get away with just running them along one side of the 4x4s. You should plan on having a couple of extra support planks as well. As far as tools go, try to get your hands on a sledge hammer, tape measure, level, ladder, saw, drill, and some screws.
Construction
The first step is to determine the length your 4x4s need to be. Do this by adding together the water depth where the rail will be combined with the height you want the rail to be out of the water (which should be determined by your skill level). Add on about an extra foot or so to put into the mud. Some people use water pumps to pump out the sand and secure their posts in place. If you don’t have access to a water pump you can do the method I like to use, which involves cutting one end of the 4×4 into a point so that it pounds into the ground easier underwater. Get up on top of your ladder and start hitting that 4×4 in until she feels secure. Chances are the top of the plank will start to chip and get busted up. If you have a good saw then you can just cut them where they need to be afterwards. Continue this step for your other posts (you should only need three if you have 10ft 1x4s). Be careful to make sure they are lined up straight and also that they are not too far apart for the running boards to reach. Use that level to make them straight! Keeping your measurements on point and your wood level is crucial at this point.
Okay, now that your 4x4s are in place the hardest part is out of the way. Grab those 1×4 running boards and your drill to start screwing those things along the sides of the 4×4 posts. It’s going to start looking like a rail at this point, so prepare yourself to get excited. Get the level handy so that the top of your rail isn’t crooked. It’s a good idea to measure and mark on the end posts where you want the top of the rail at so that it matches at the ends. Once your running boards are screwed into place on each side you might want to put a small stud board under the running boards on the 4x4s to extra secure those guys from slipping. Screw in your (optional) top board and then it’s time for the top.

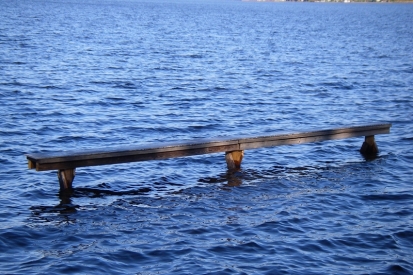
At this point it’s time to grab your Trex or other name brand decking wood material and position it on top of the rail before you screw it in. Drill that bad boy in and make sure there is nothing that might catch you while sliding. All that’s left now is to take a couple scrap boards to use for some extra support along the 4×4 posts. Hold them diagonal along the 4x4s going into the ground and use your sledge to pound them into the ground, then simply drill the top of the board into the 4×4.
With your new flatrail you are on the same playing field as the top pros, and remember, you can always winch when it’s windy. Hallelujah.


