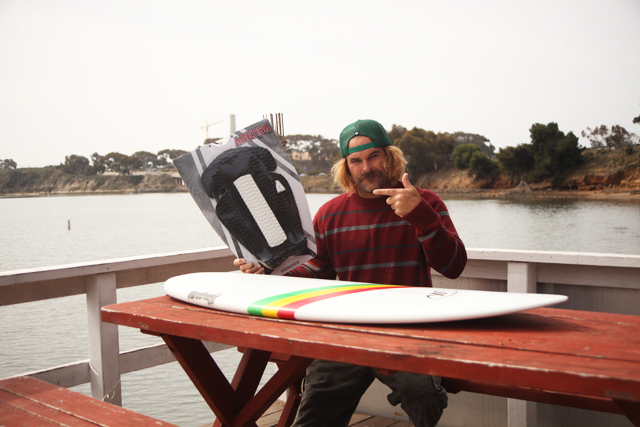
How to 101 "Applying Traction"
How to 101 is a way Alliance Wakesurf looks to give back to the sport where everyone starts. It’s about learning the process and methods from other great thinkers and athletes in the sport of wakesurfing to better our experience and the products we use. Today our Editor Josh Sleigh is showing us the process in which a person applies traction to a wakesurfboard. He says you would not think it to be rocket science, nor of any importance, but what you dont realize is it is very important to having a long lasting wakesurfboard with grip. If you apply the traction correctly the first time. You will never have to worry about that process again. So sit back read up and lets get started..
Step 1: Make sure you have the desired traction template and color. Now days traction companies provide arched pads and non arch type traction pads. It’s important to make sure you got the correct pad for your foot and board. Not just the color you were going for, comfort is confidence!
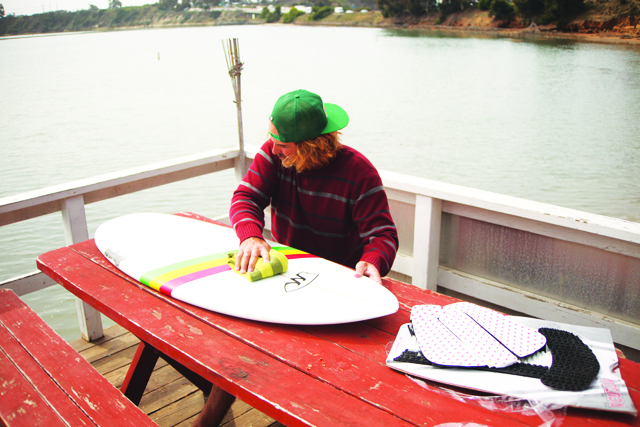
Step 2: Clean the deck of the wakesurfboard. This day all I had was a shirt. It does not matter. Just as long as the cloth you clean with is able to leave it lint free of debris and no moisture. Any particles/dust create air between the pad itself and the deck of the board when the pad is applied. When the pad gets wet the moisture absorbs into the pad and in those areas between dirt and pad on the traction it does not have a clean bond and will eventually lift and not stick any more to the deck of the board. So before applying your traction make sure it is very clean. (note: If you desire to use a cleaner I recommend you check to make sure it does not melt the epoxy or poly resins. Windex will work fine. Make sure the deck of the board is dry before pad application.)
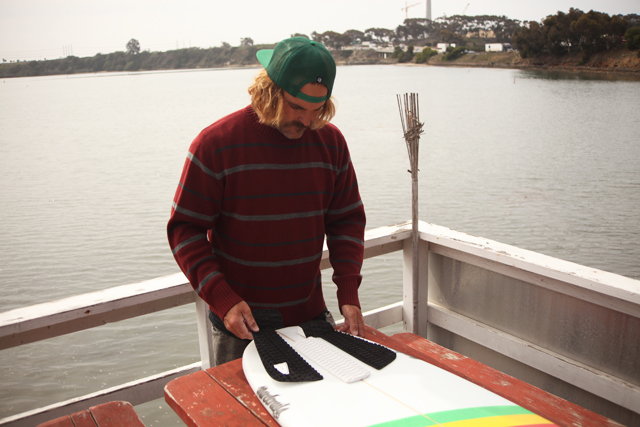
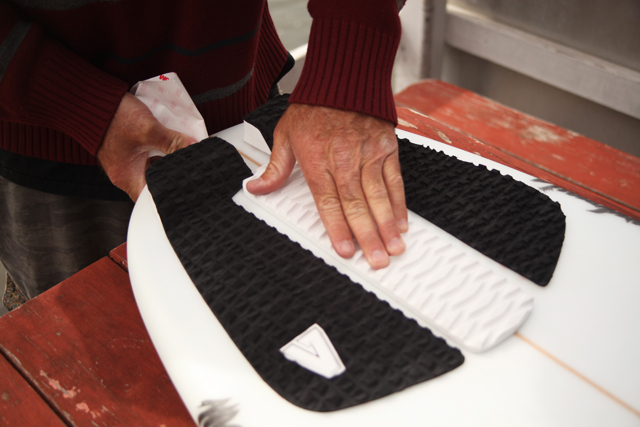
Step3: Where to lay pad? Each board is going to have a different shape. It’s important to take note when searching for the correct traction pad to look at the outline of your board. Some athletes may even measure. Just depends on the athlete and how much area he or she wants to get covered on his or her board. Personally I like to have a pad that covers the deck of the wakesurfboard but leaves room like a 1 1/2 inch or 2 inch boarder around the board to release water flow and not grab water on the rails because the pad is to close to the rail. Placement is key. Check out the photo below as I search for the perfect spot on the tail to mock up where I plan to plot the tail pad down.
Step 4: Now remove the backing on the pad that exposes the glue. Some glues take up to 24 hours to properly bond the traction pad to the board. Check manufacturer suggestions on this step for when traction is applied to the wakesurfboard.
Step 5: Now that the deck is clean and dry apply the traction pad to the deck of the wakesurfboard. I recommend starting at one side of the piece of the traction pad and just like a applying a sticker to any surface work your way across the material with a pressing pressure working one side to the other slowly laying it down so no air bubbles exist or happen under the traction pad. (Note: Air bubbles = loss of adhesion and when the board gets wet the pad will not stick correctly.)
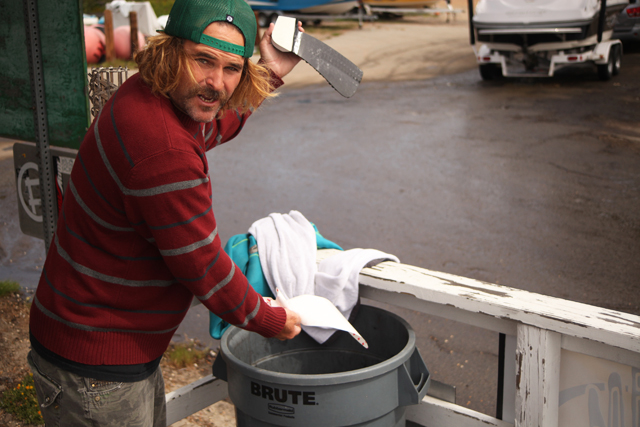
Step 6: It is important to always throw away your trash after or when applying new traction pads. No one likes a liter bug or trash at our rivers, lakes, or lagoons. We want future generations to enjoy the same space or water way the same way we got to enjoy it,clean!
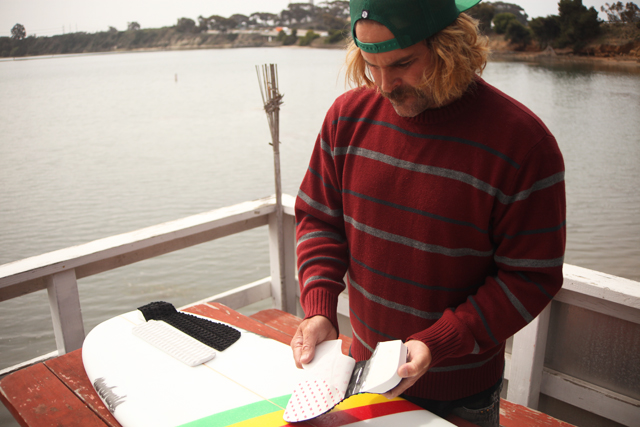
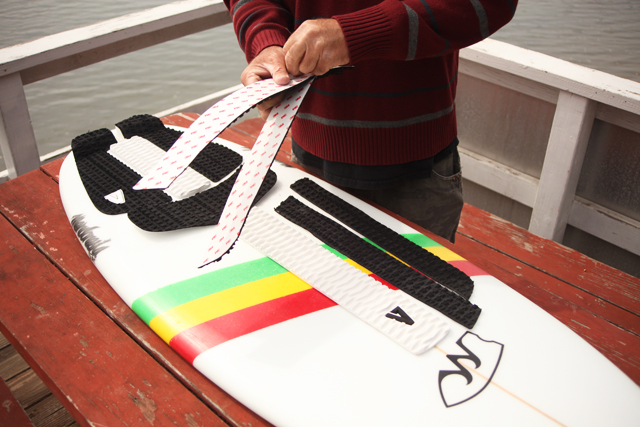
Step 6: For front traction pads if you’re not gonna use wax or other traction for grip apply steps 1-5 with the same process for application. This time though measure your natural surfing stance. Some wakesurfers have a wide stance and some a narrow one, each his own. Surfers take note where your foot will go when riding your board pumping and as if you throw an air. Even look at old boards to see what or where the pressure dents may be for your sweet spot and applying traction. I always find it to be a great indication of where to stick my front traction pad. For riders being your first time measure standing next to the board as if you were riding and being agressive on the wave. This will give a good indication with where to apply your traction as well on the board, to each his own as this is what I have done with freinds who were gripping their first board. But remember! Once the pad is applied to the board there is no turning back.
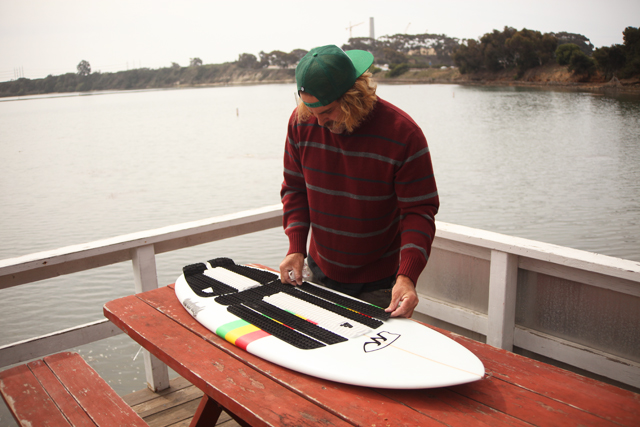
Step 7: In the end your traction pad when laid out correctly and applied to the wakesurfboard will look like this in the photo below. I hope the “How to 101” with applying traction pads to your wakesurfboard is imformative, increases your riding pleasure, and knowledge with the sport. Special thanks goes to Agenda Traction and Mendonesia Surf for providing Alliance Wakesurf the products to give insight to the application process. Wakesurfing is all about fun and doing it right.


October 7, 2014
Day dan piano uy tin, chat luong tai tphcm, day dan piano kinh nghiem, giao trinh hien dai, giang vien kinh nghiem.
November 21, 2014
Greetings from Ohio! I'm bored to death at work so I decided to check out
your website on my iphone during lunch break.
I love the knowledge you present here and can't wait to take
a look when I get home. I'm shocked at how fast your blog loaded
on my phone .. I'm not even using WIFI, just 3G .. Anyways, great site!